git and github

maybe you already know other ways to share code?
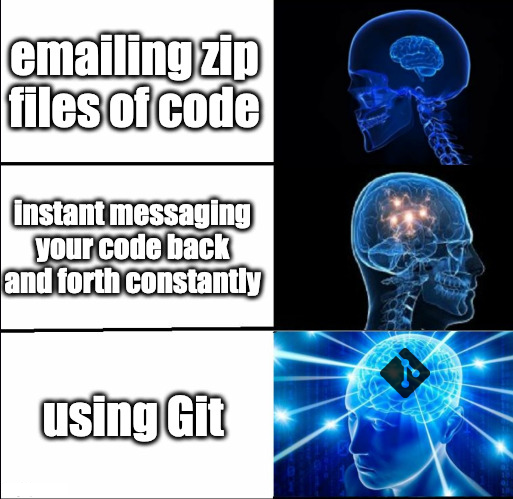
why git?
- it’s popular! in the stackoverflow developer survey, 93.9% of developers using version control software said they use git.
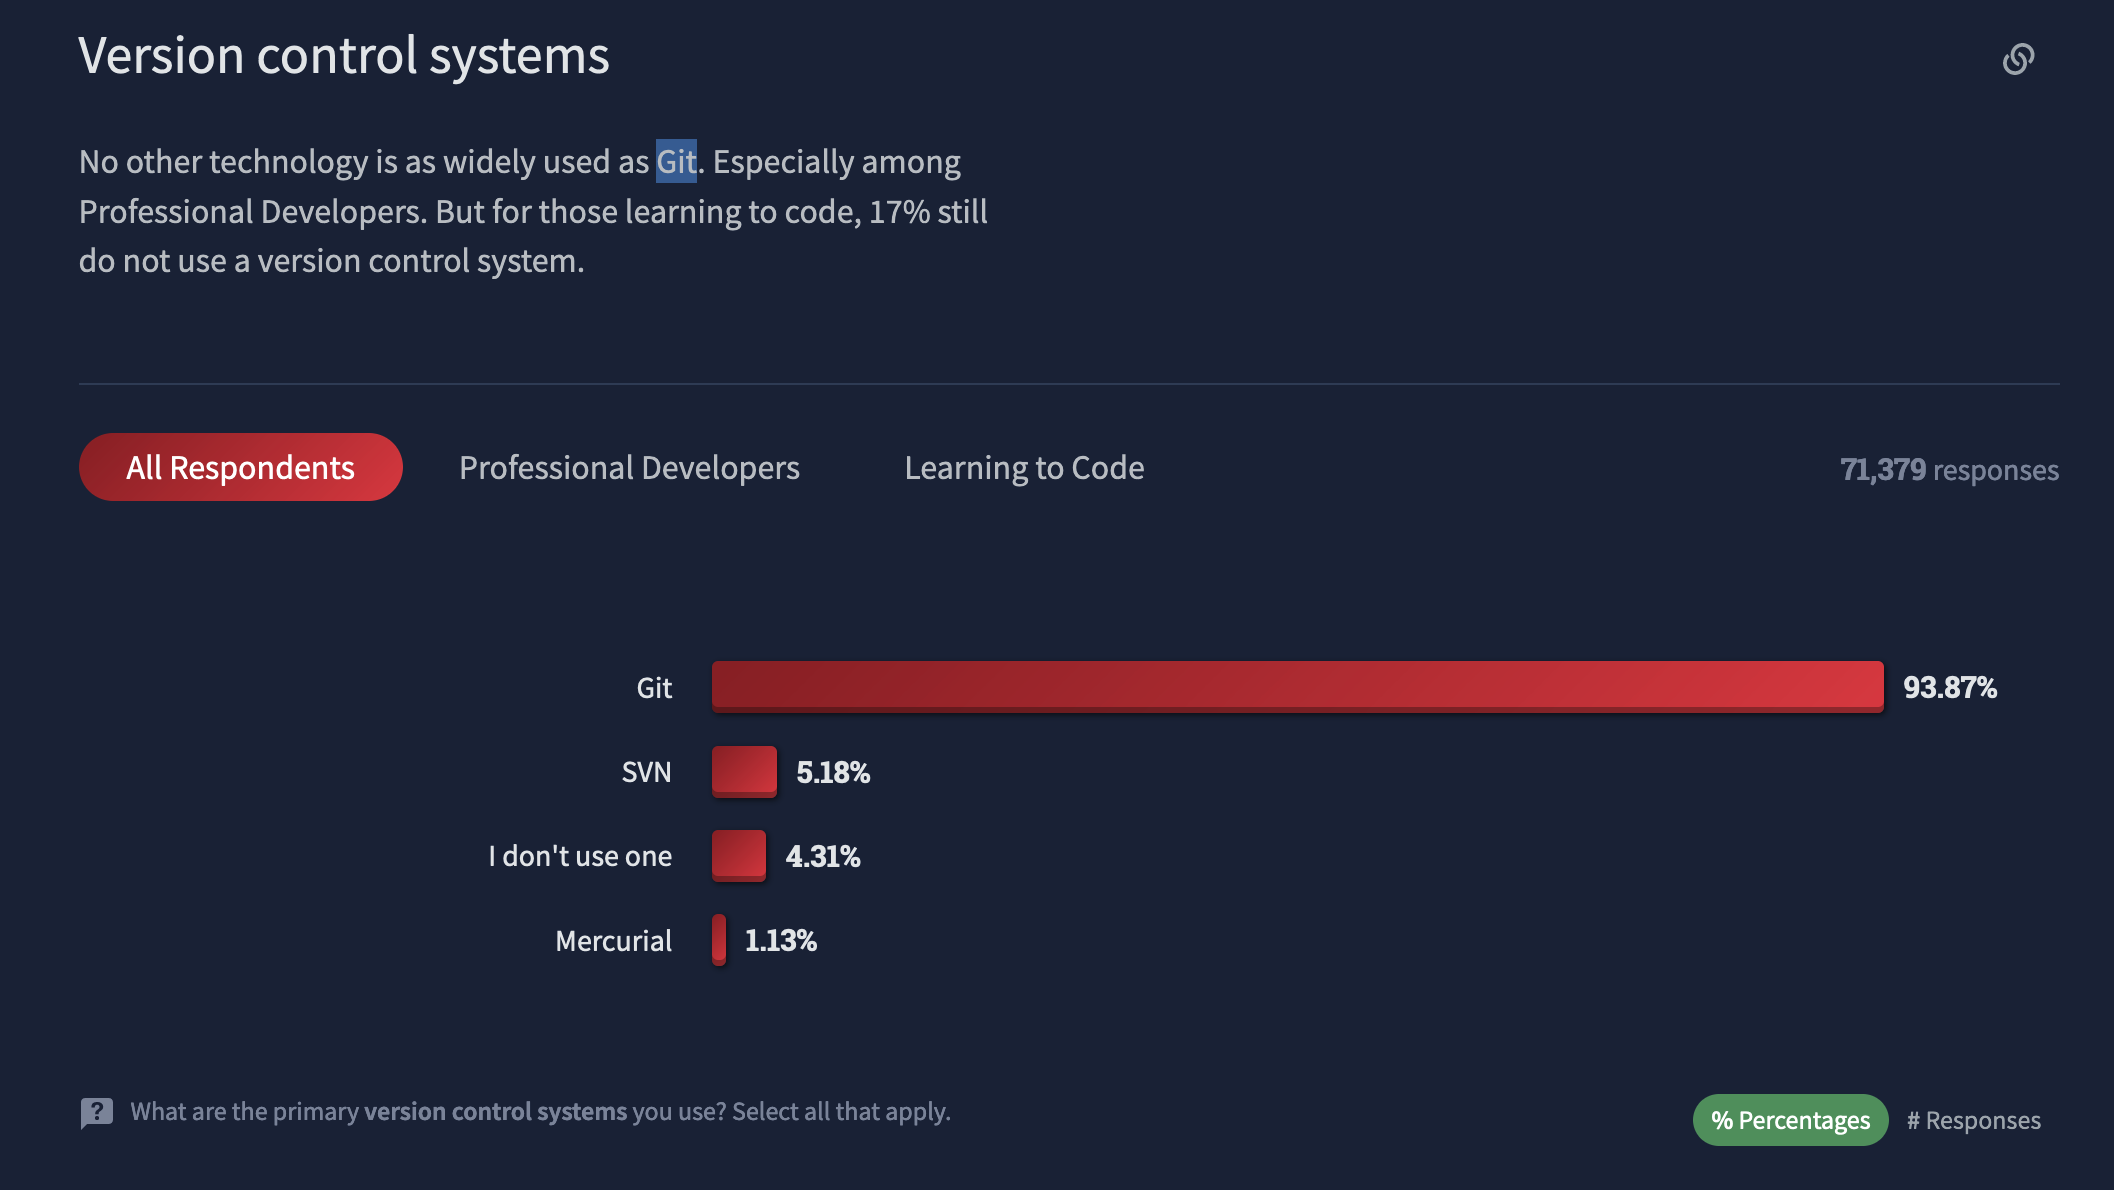
the result is that git comes with a large resource base and is compatible with all the major operating systems.
github
- github is a website and online service with free and paid tiers that allows you to:
- host git repositories
- publicize your profile and repositories
- track issues
- document your projects with wikis
- host static websites
- coordinate teams of developers
- do project management
- automate project workflows
![]()
github’s mascot and logo is the octocat, a creature with five octopus like arms. the octocat character was designed by the same graphic designer, simon oxley, who designed the bird logo that twitter uses.
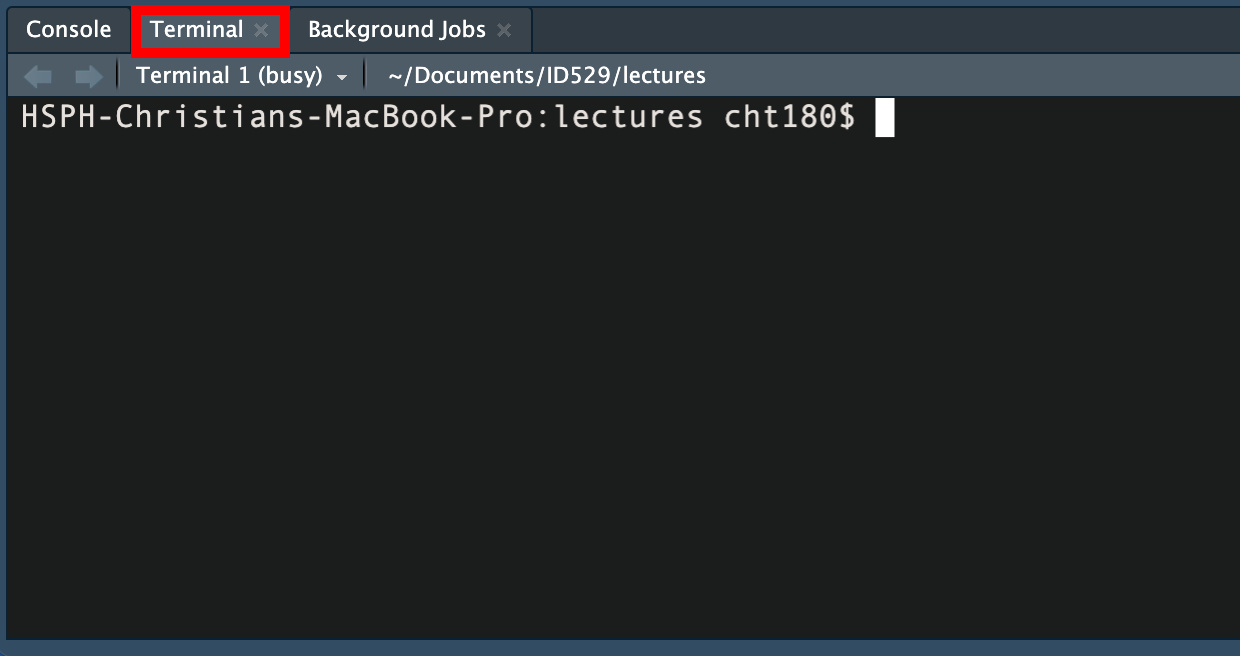
a quick note about the terminal
in RStudio you can open up a terminal in a window next to the R Console:
setup a github account
sign up at https://github.com/login
some advice from happy git with r:
- incorporate your actual name
- reuse your username from other contexts
- pick an appropriate username you will be comfortable revealing to future bosses
- shorter is better
- be as unique as possible in as few characters as possible
- make it timeless
- don’t highlight your current university, employer, or place of residence since these can all change
- all lowercase is recommended
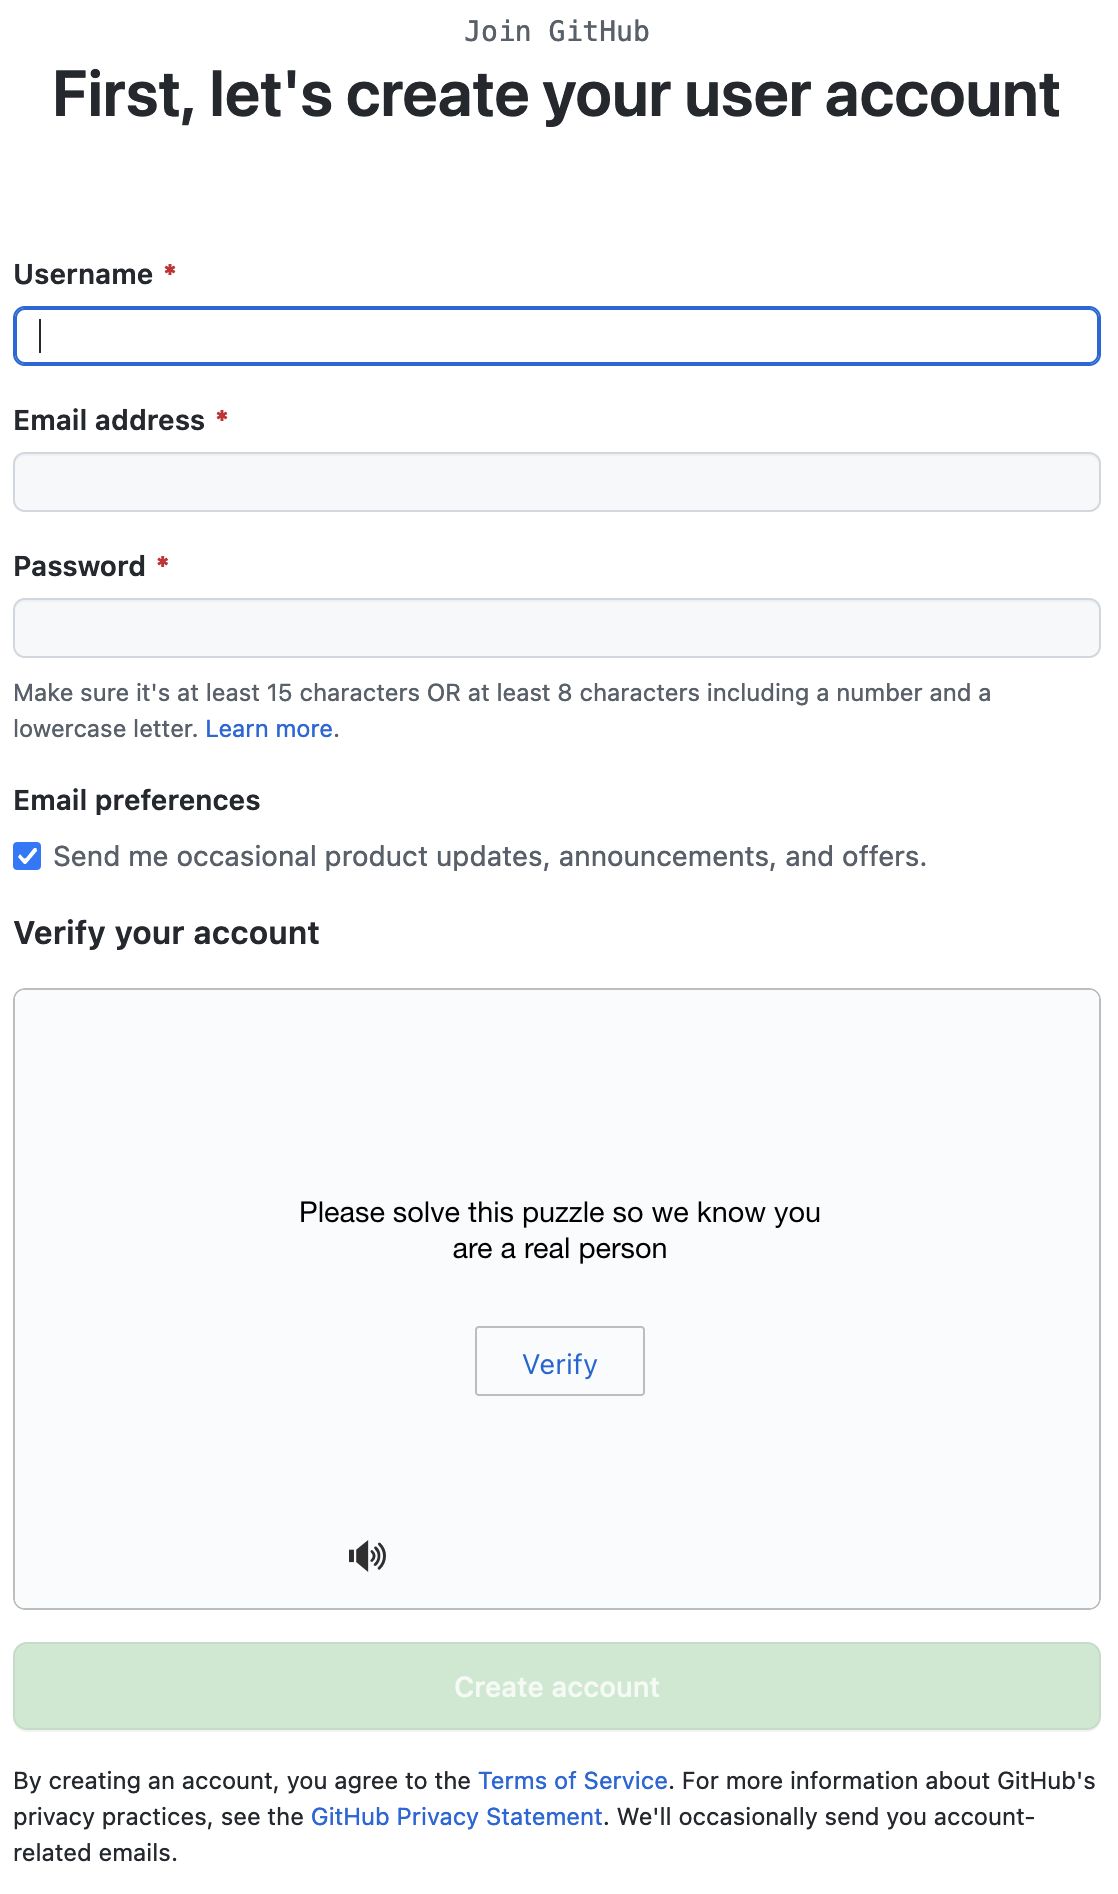
the form for creating an account on github
set up a local repository in rstudio
nativate to file → new project
select “create a git repository” which informs rstudio you want to use git.
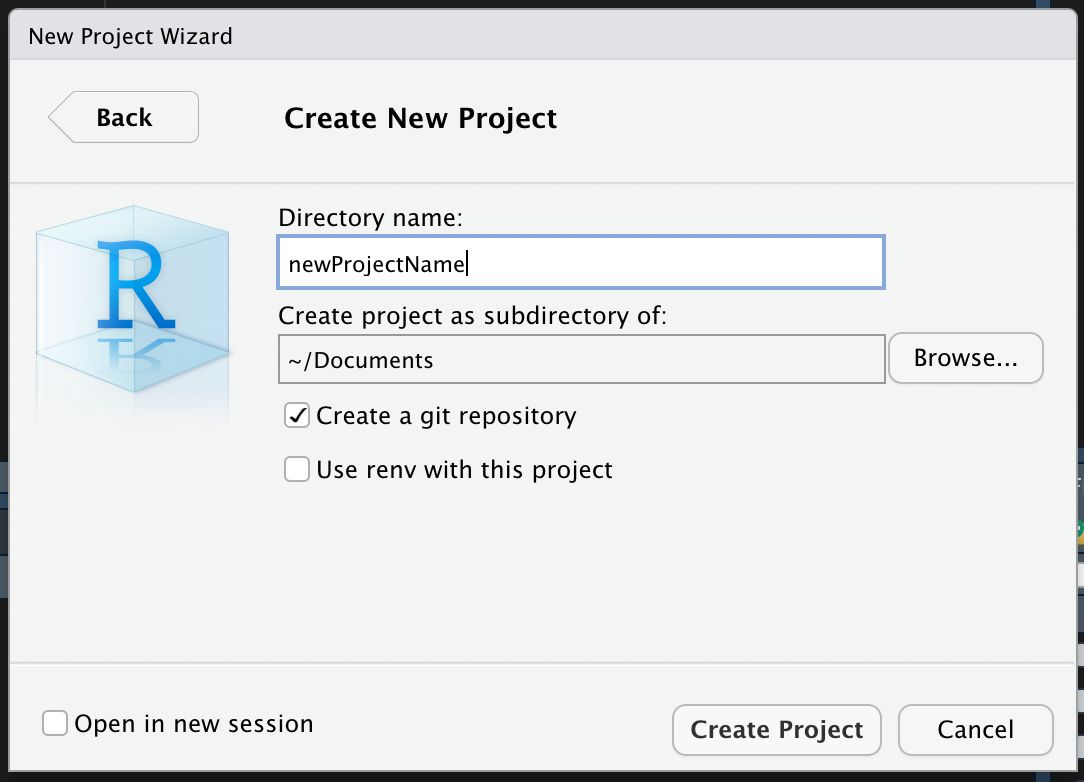
with the new project wizard window in rstudio, you can specify the directory dame for your project, create your project as a subdirectory of another folder, and use the provided checkbox to indicate that you’d like to initialize the project as a git repository.
git panel in rstudio
rstudio adds a git tab in your environment/history panel.
this panel is a point-and-click interface to:
- review your changes
- stage changes
- write commits
- push and pull commits
- view the commit history
- navigate branches
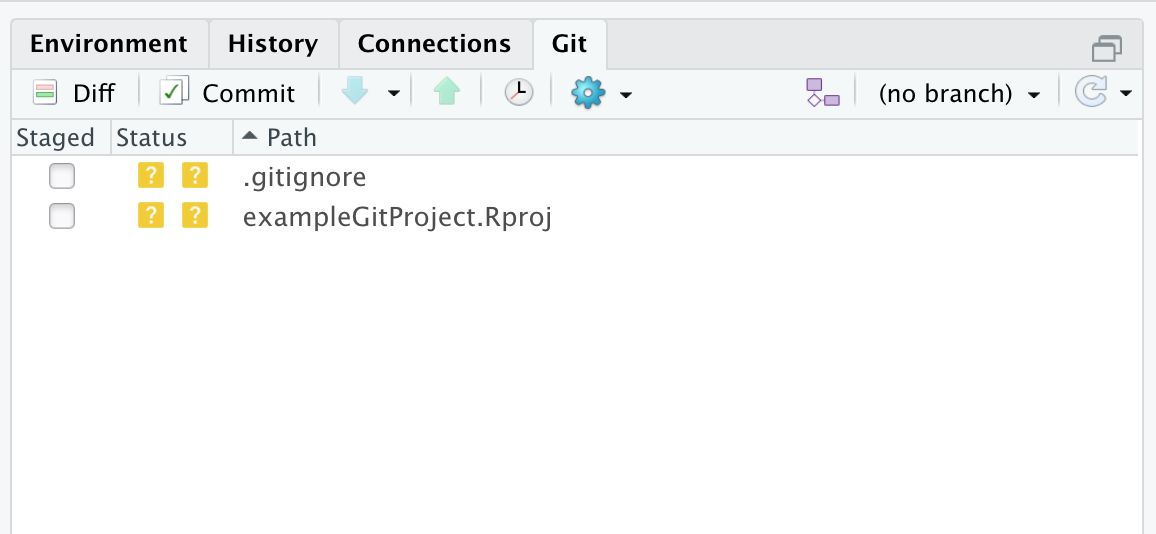
the git panel in rstudio shows changes you’ve made and lets you see the changes you’ve made, commit them, and push them to github in a user-friendly interface.
setting up a remote repository
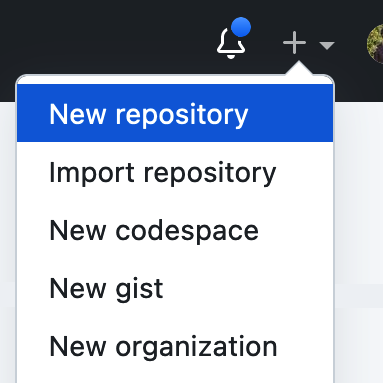
navigate to github.com → login → new repository
and fill out the form.

create an initial commit and push
# let your local repository know about the remote repository
git remote add origin git@github.com:ctesta01/examplerepository.git

git branch -m main # use "main" as the default branch
git add .gitignore # add a file to the staging area
git commit -m "initial commit" # name your commit
git push -u origin main # push your commit to the remote repository
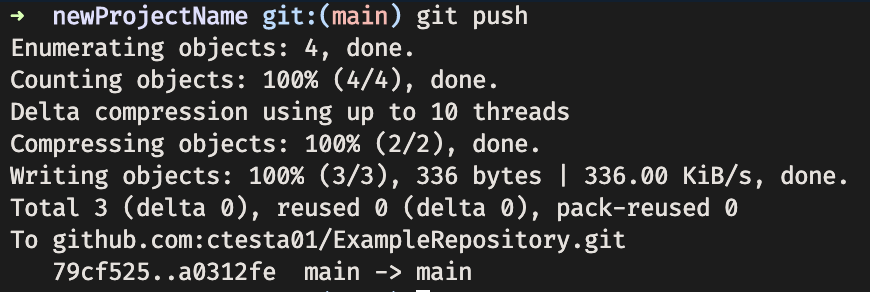
these are the above commands being run in the terminal, along with the output produced. you can see that git will report on how many objects and how many bytes are being uploaded.
congrats!
you’re using github!

basic workflow overview
the basic workflow for making updates to a git repository is done in three steps:
- making changes to your files
- adding them to the staging area
- commit these changes with a explanatory message
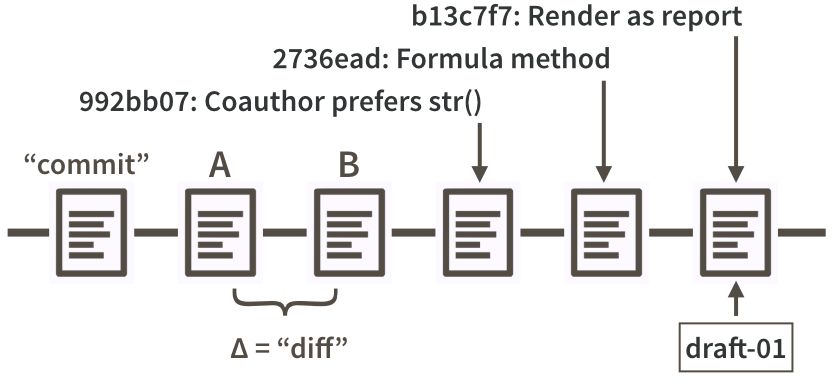
this figure from happy git with r shows examples of commits made in a sequence. each commit is accompanied by an id, a message, and the differences between two commits are referred to as a “diff”.
git status
git status is a basic command that displays the current state of the working directory.
it’s a good idea to always run git status before changing your code because there may be something you want to commit or address first.
the rstudio git panel displays most of what is displayed in the output of git status.
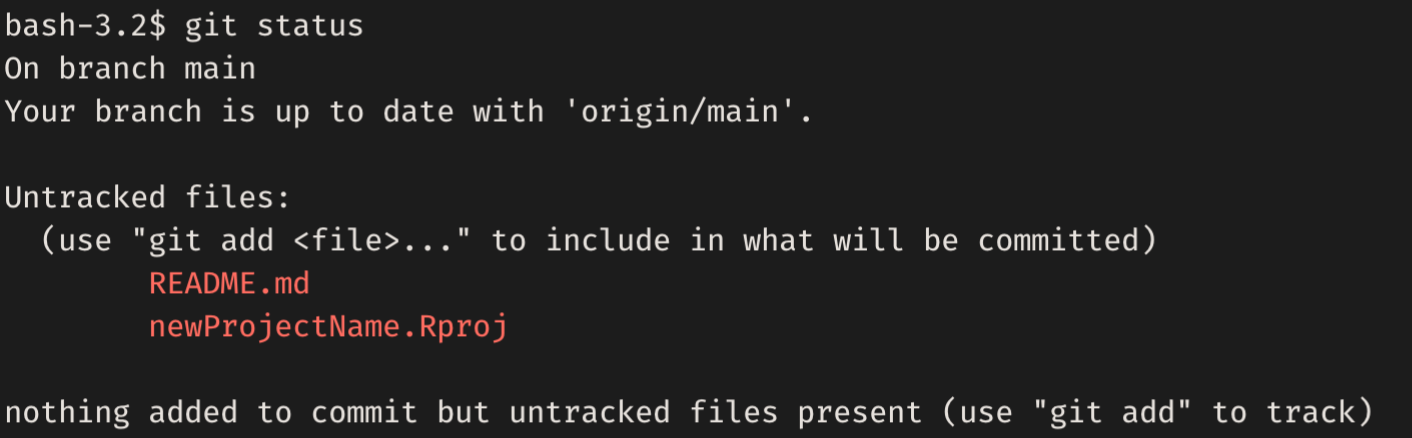
git status from the terminal
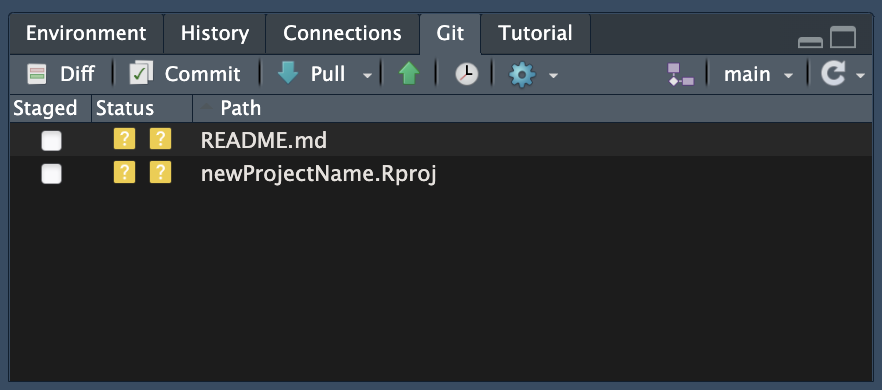
the git panel in rstudio showing new, untracked files
git add
- adds changes to the staging area (also called the index)
terminal version:
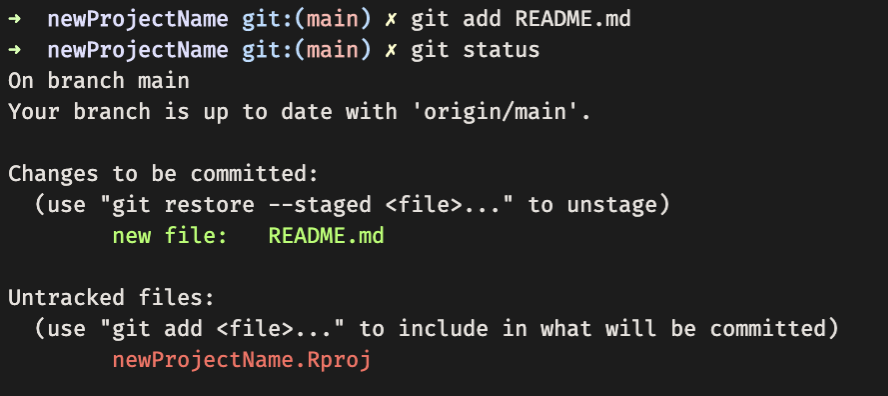
git add readme.md adds any changes to the readme.md (including its creation) to the staging area. git status shows us what changes are staged to be included in the next commit.
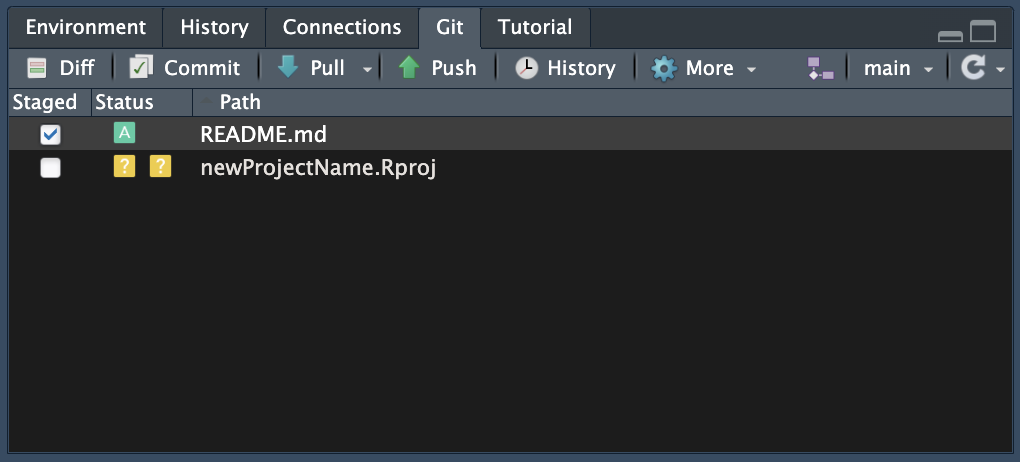
one can add files to the git staging area in the rstudio git panel just by checking the checkbox next to each file in the staged column.
git commit
- records changes to the repository from the staging area
terminal version:

git commit -m 'add new readme' creates a commit message (or basically a name) for the set of changes that were on the staging area and bundles them up together as a commit.
if you need to write a longer, multi-line commit, git commit will open your default terminal based text-editor (often one of nano, vi, or vim) where you can write a longer commit message and save it.
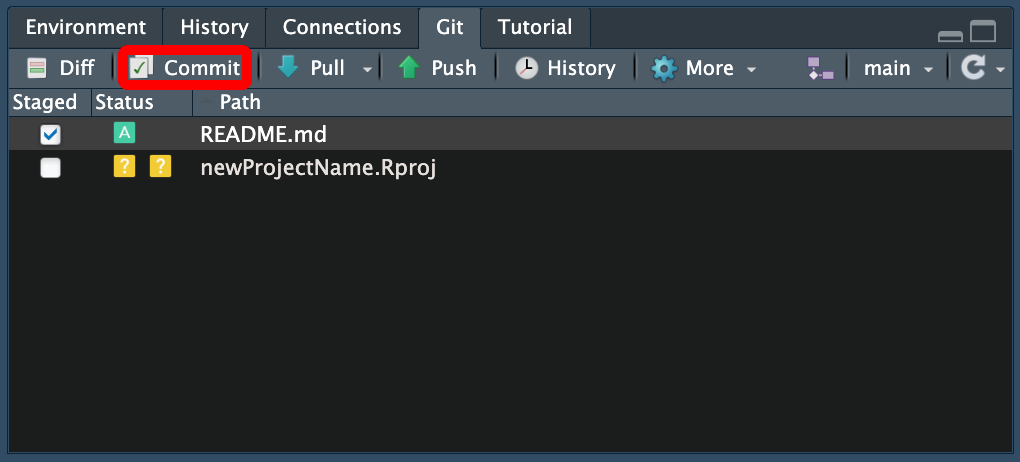
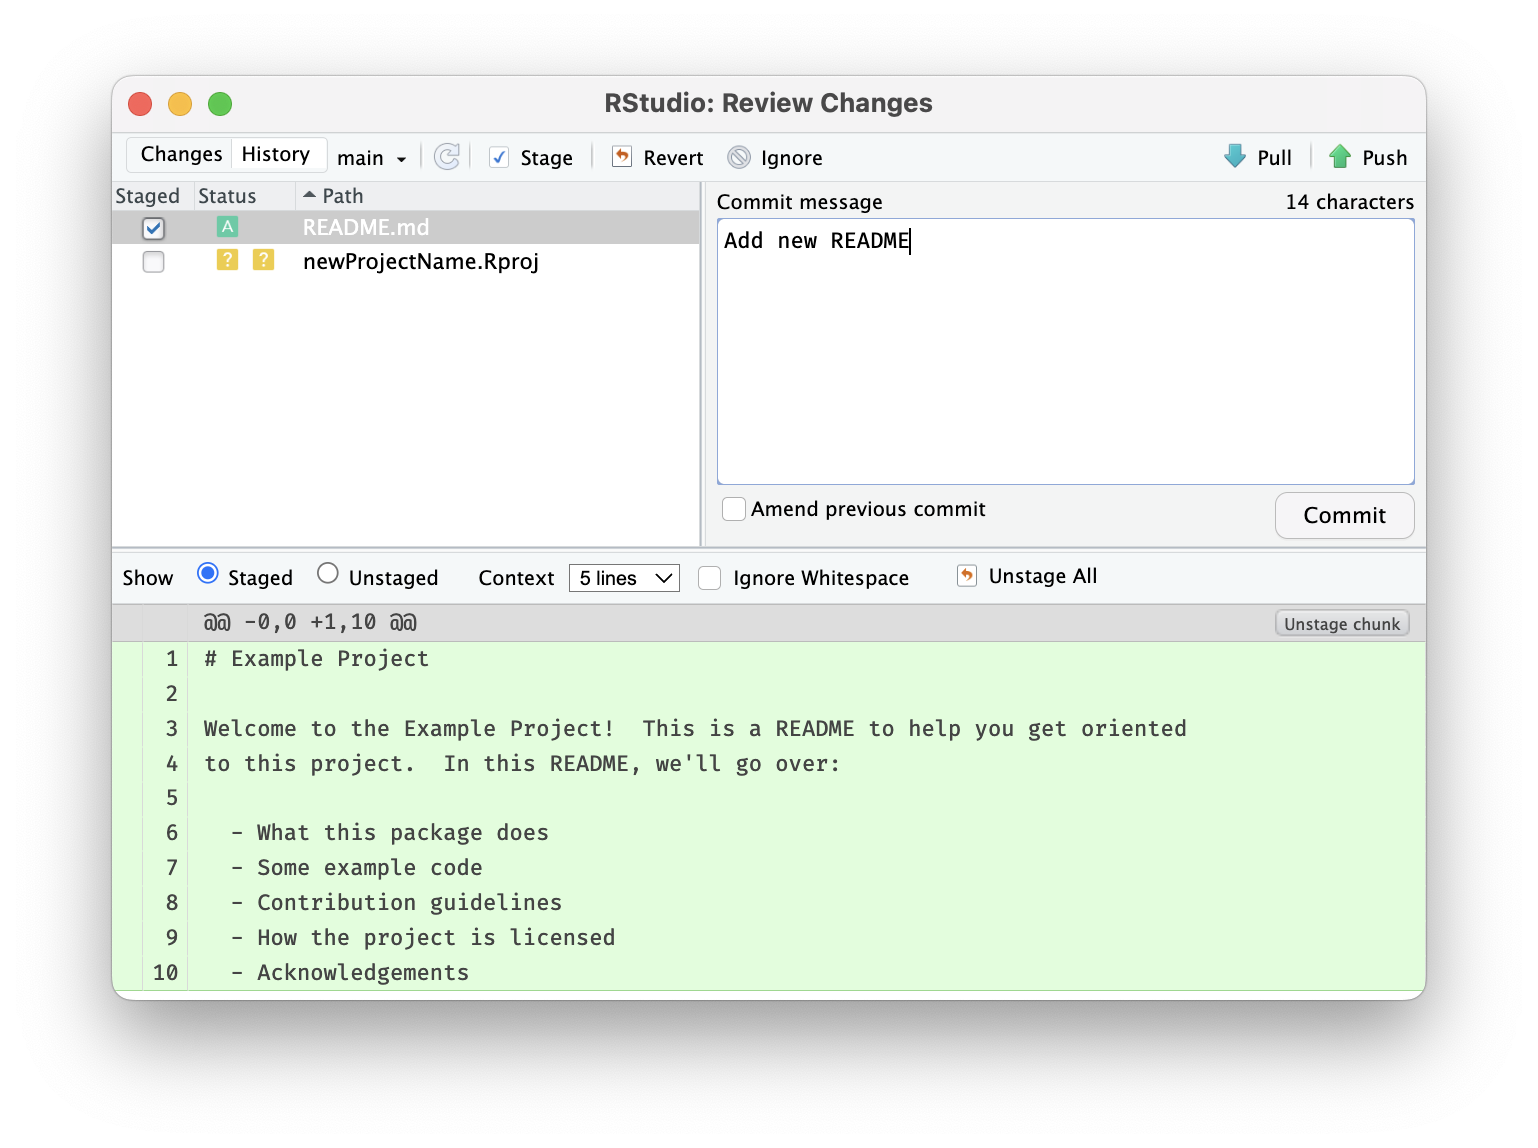
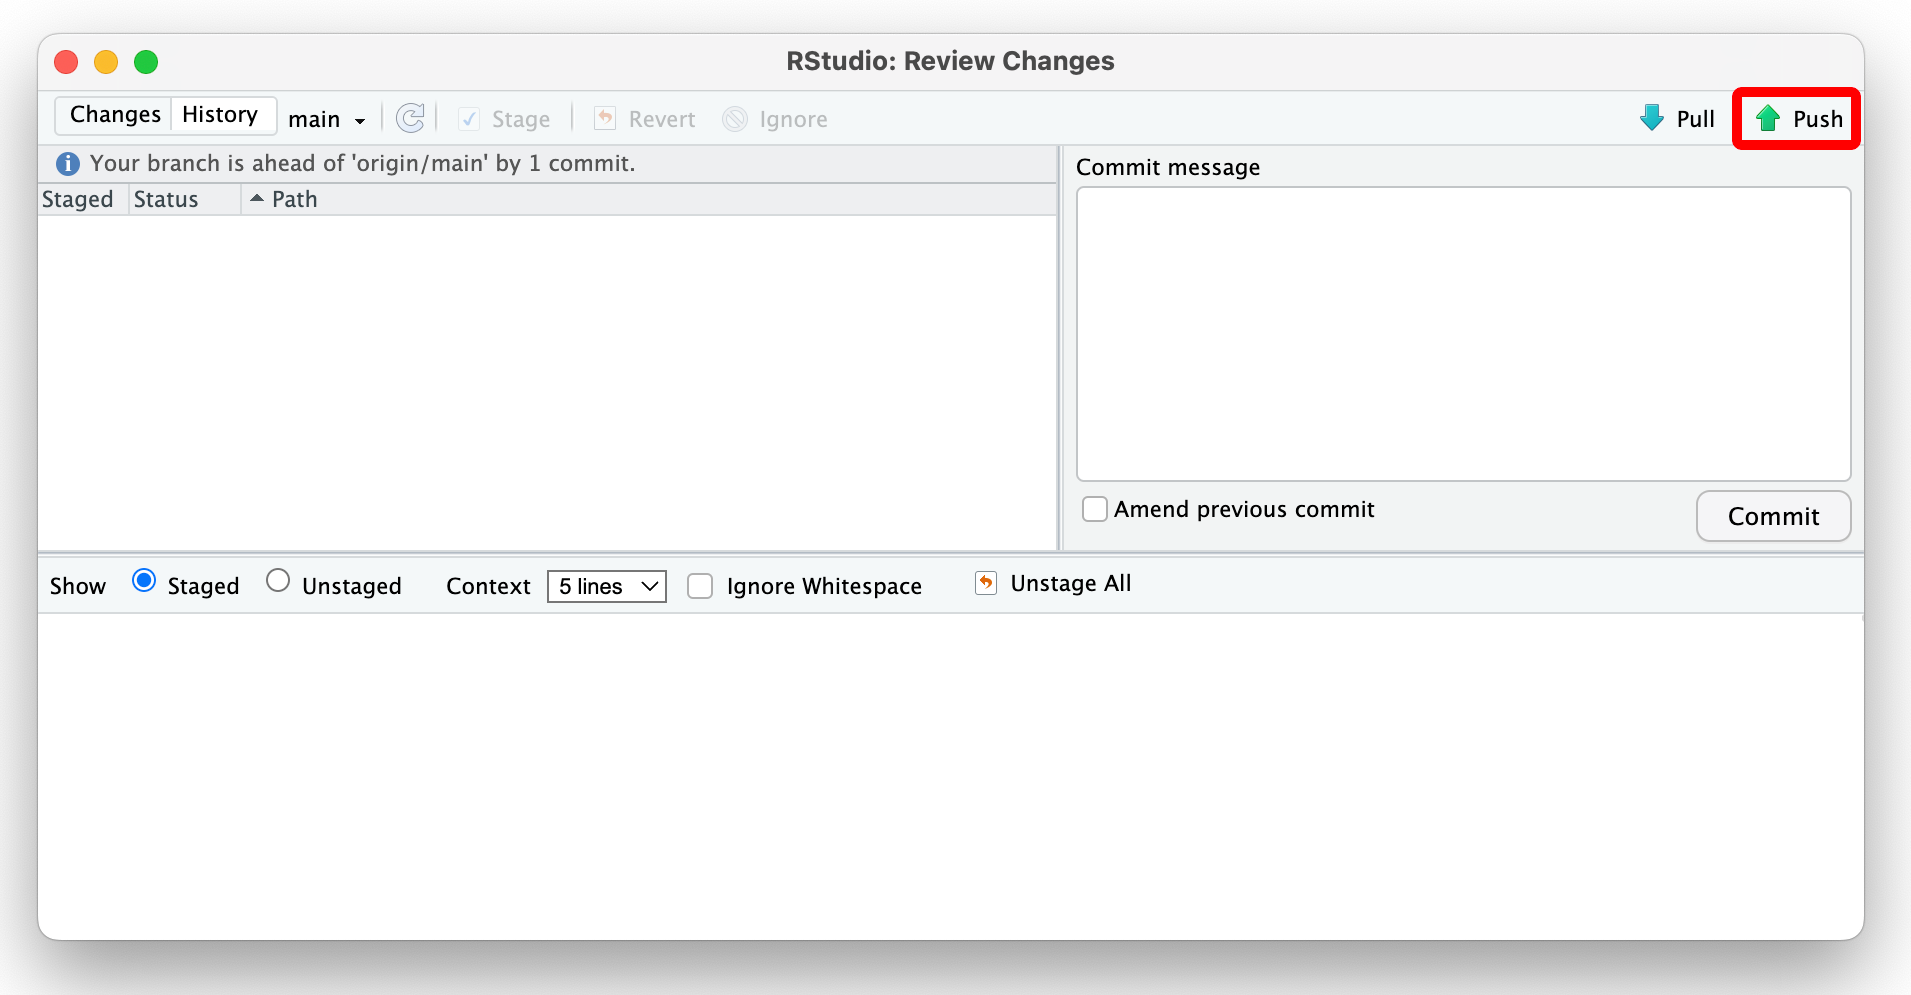
with the changes you want to make staged, click the commit button. you’ll have a chance then to view what changes you’ve made. when you’re sure you want to commit, you can write a commit message, click commit, and then push.
git push
- sends local, committed changes to remote repository
terminal version:
Calling git push on the terminal sends the commits from our local computer to the remote server.
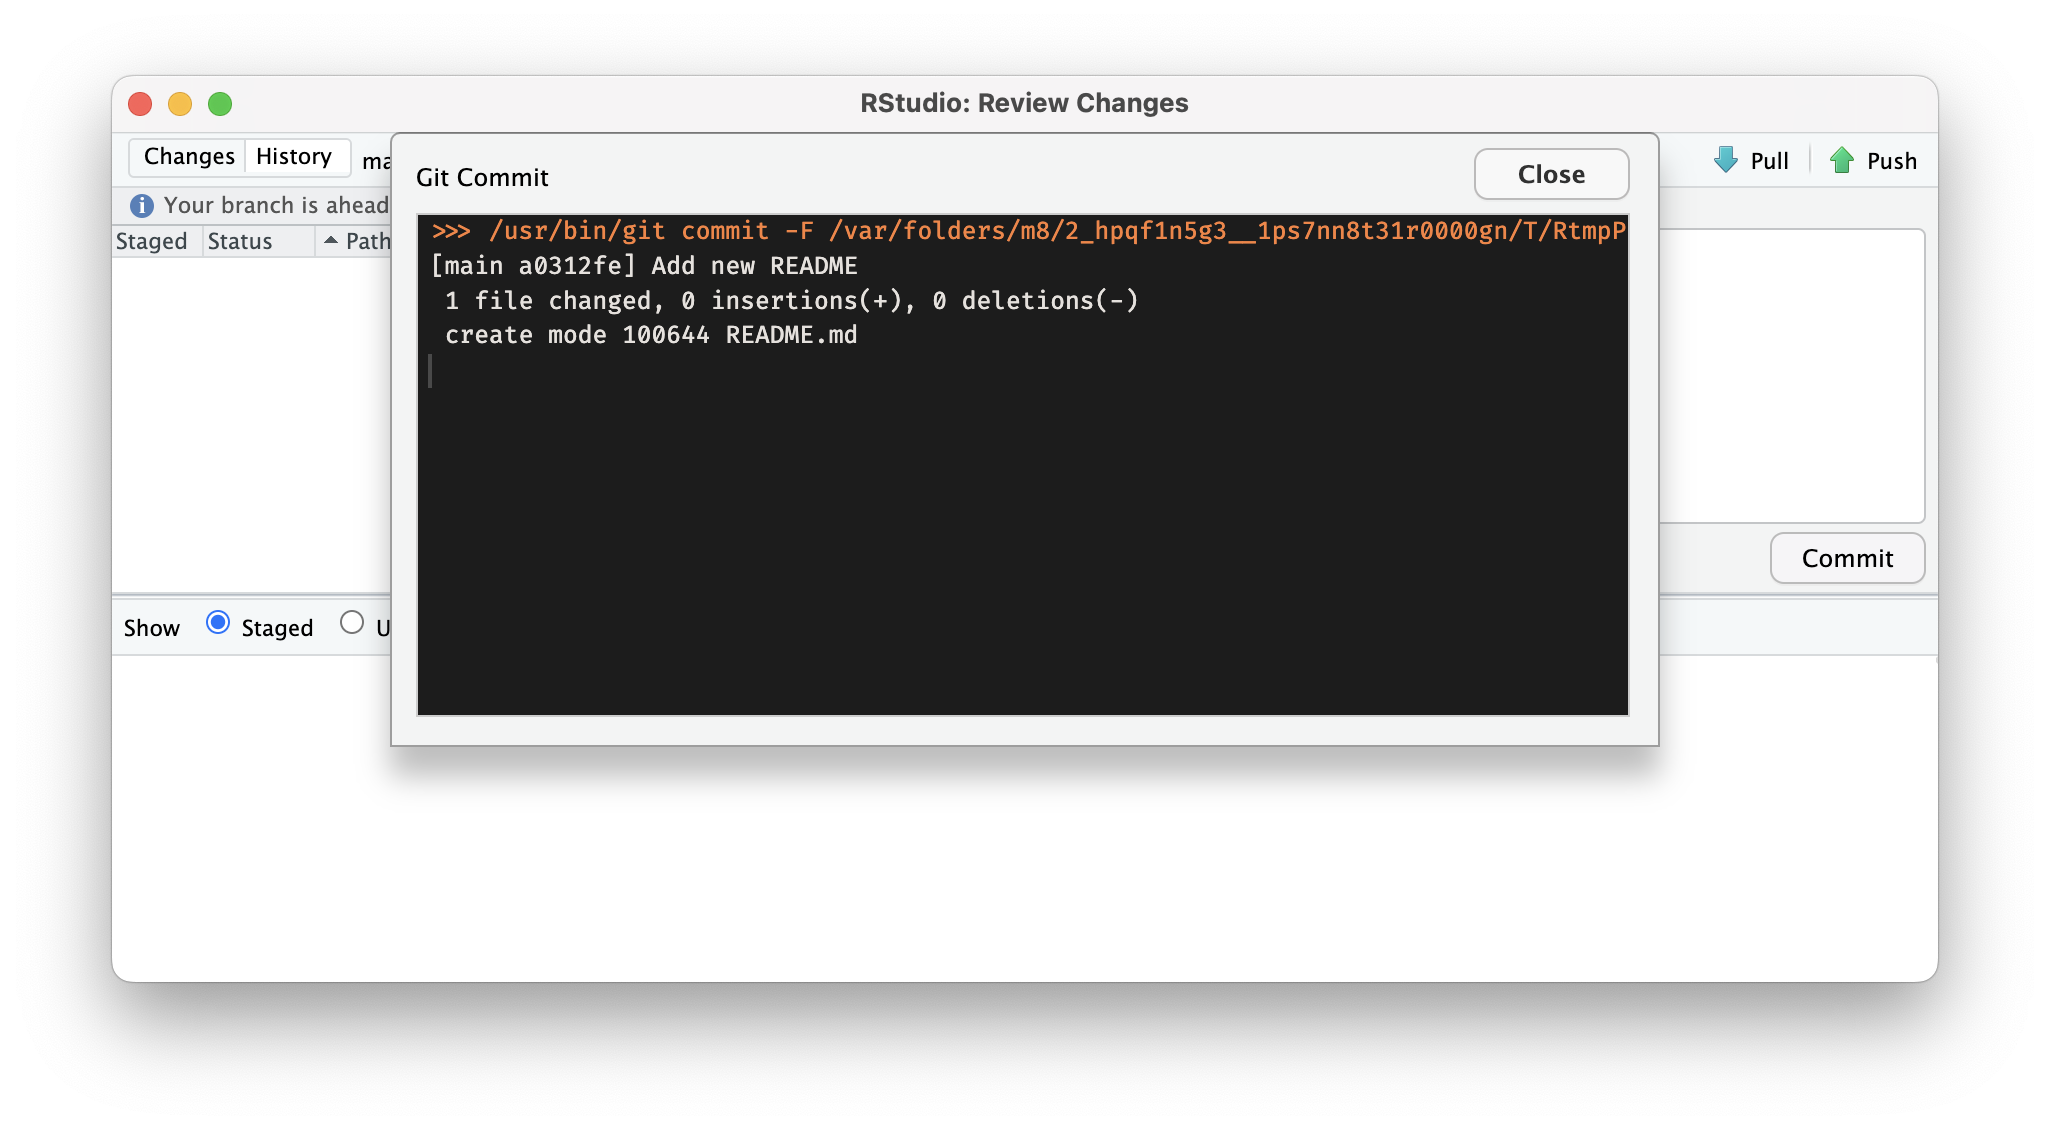
After you click Commit, a window will open showing you the git command that RStudio ran to create your commit. If there are no errors, you can close the window and then click Push.
git diff
git diffshows how files differ between their current state and a different version.
terminal version:
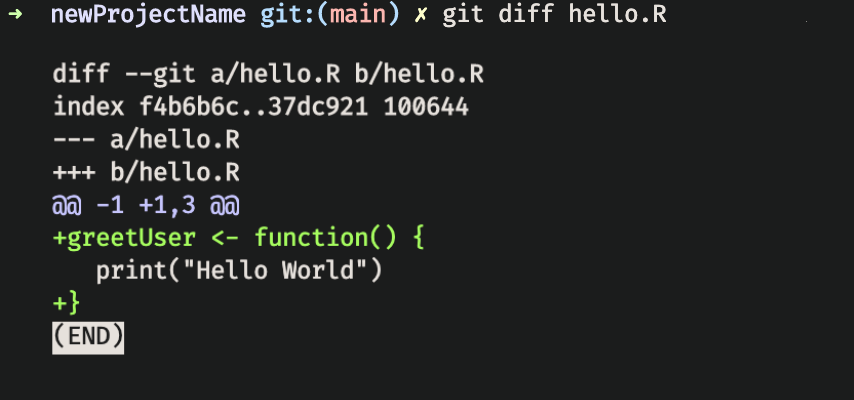
git diff on the terminal will print (in highlighted colors) what has been added or removed from the referenced file since the last commit.
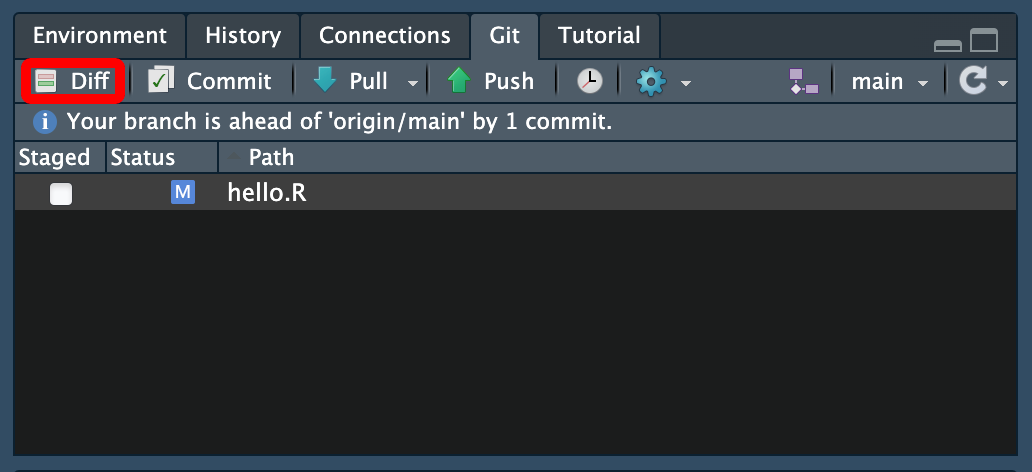
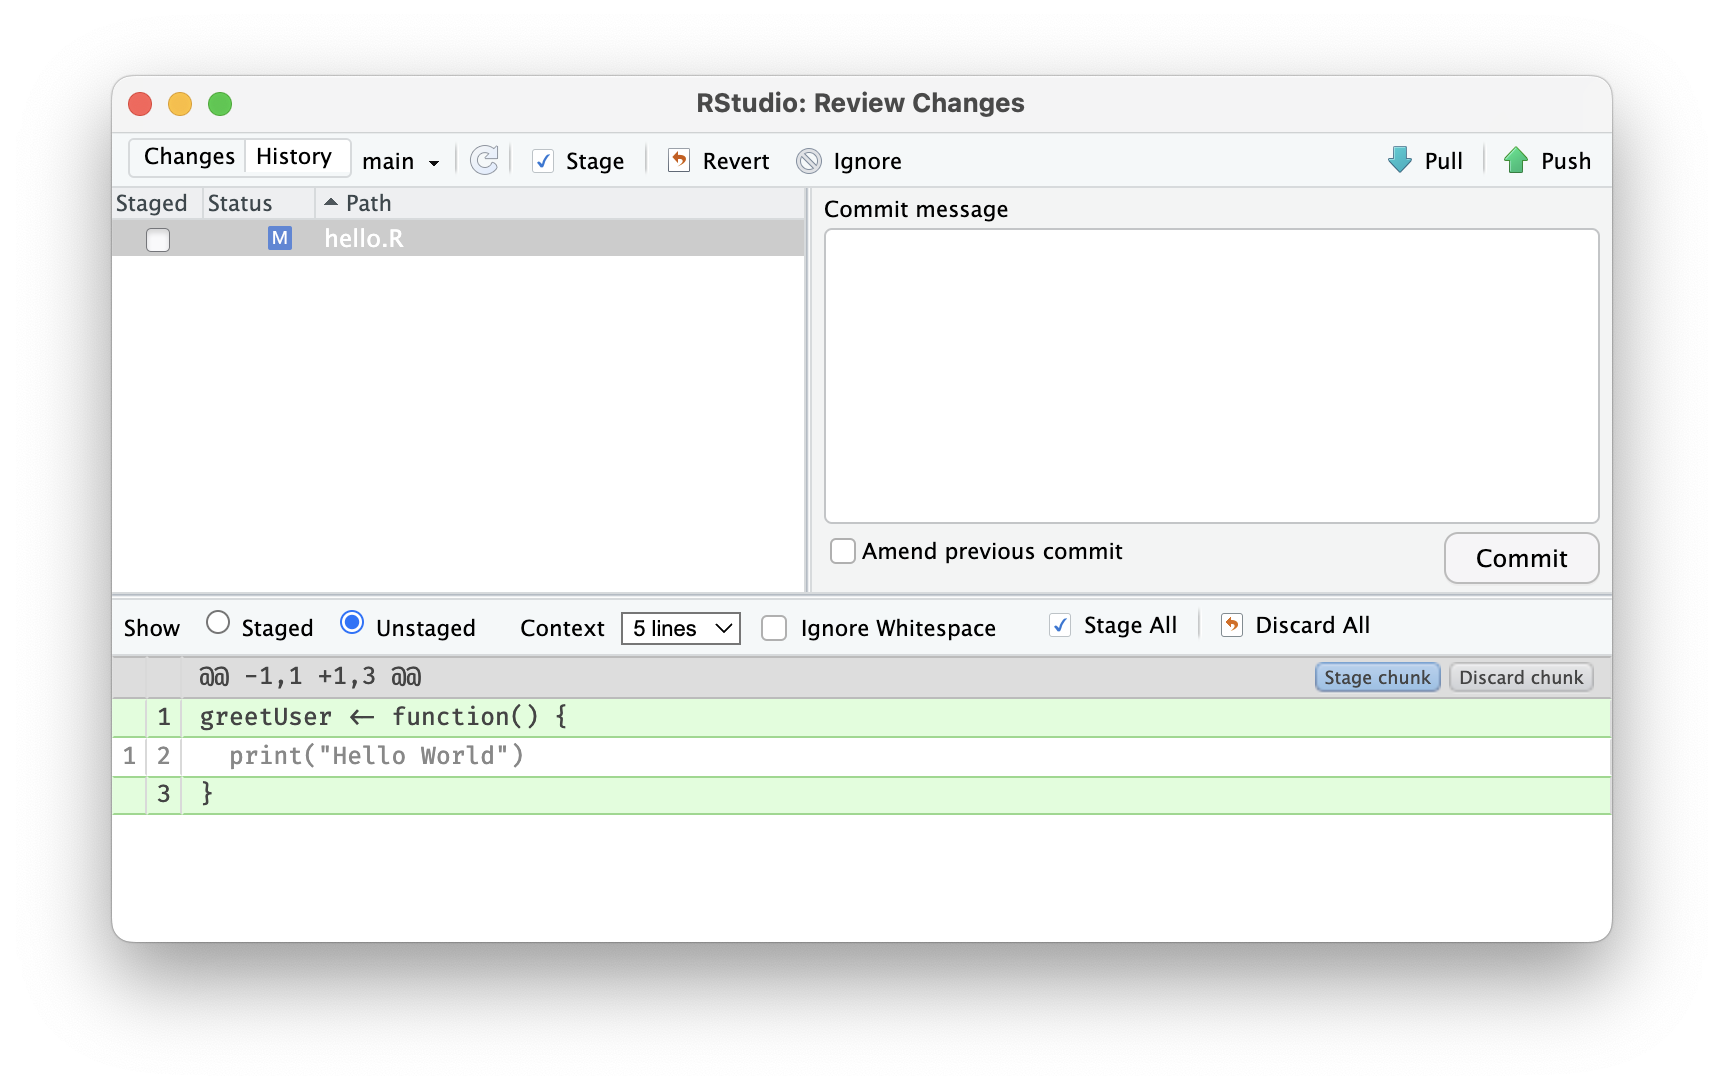
in the rstudio git panel you can click on the diff button and it will pop open a window showing the changes that have been made to the file since the last commit.
git pull
- download and integrate code from one repository to another (i.e., to get up to date with a remote server)
terminal version:
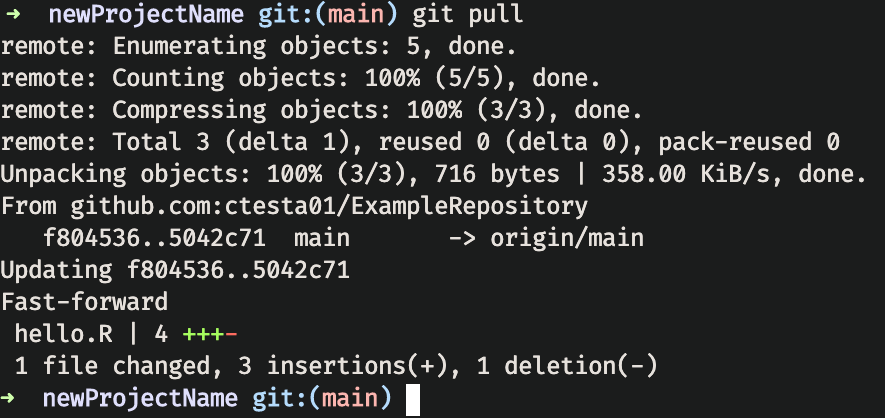
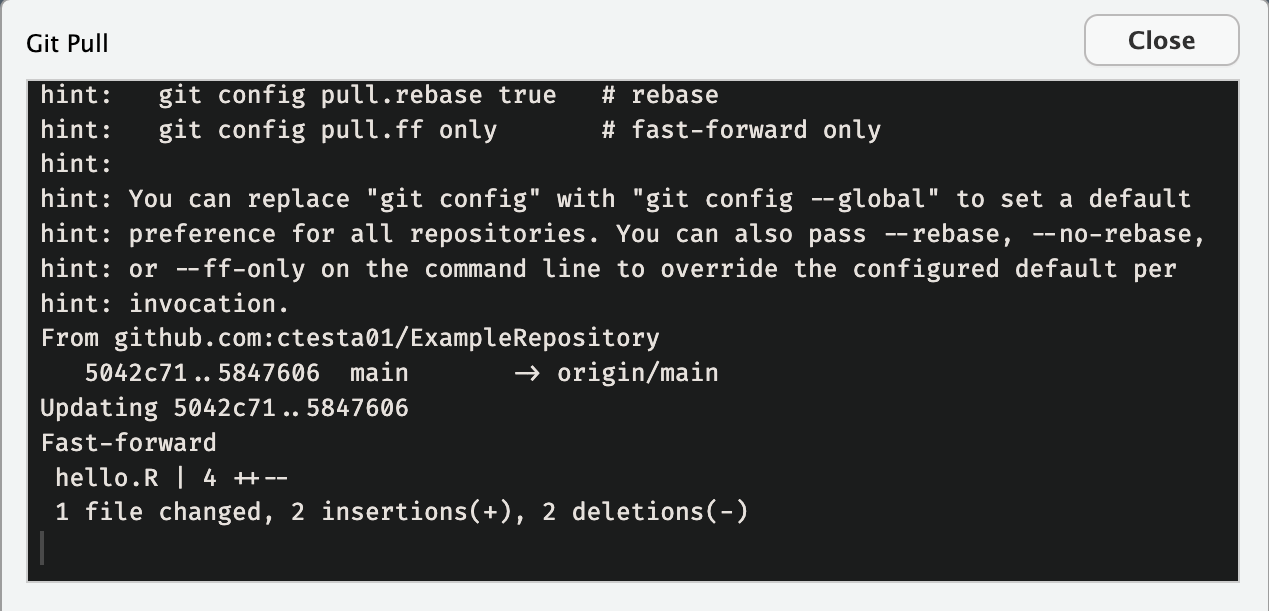
calling git pull on the terminal will download any commits from the remote server and apply them to your codebase. you may get hints from git that you can be more explicit about your git configuration as to how you’d like to apply commits if there are conflicts.
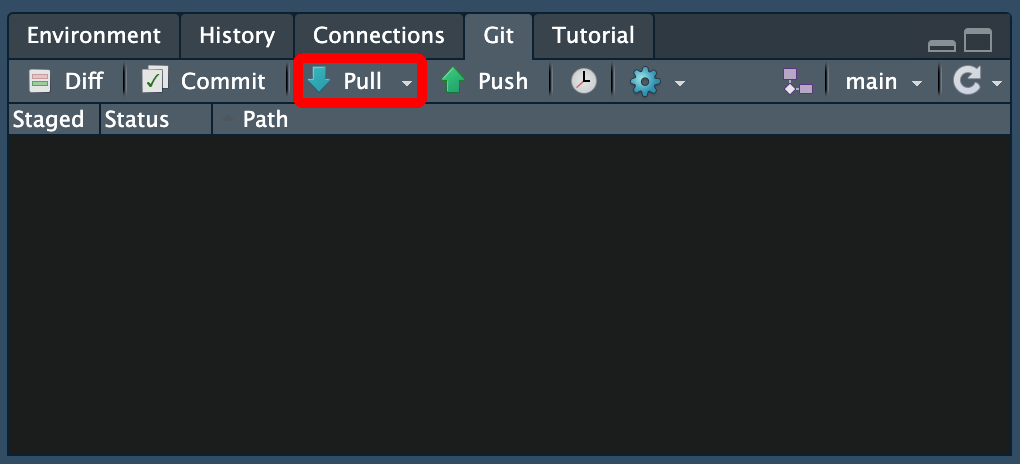
in the rstudio git panel you can click on the pull button and it will pop open a window showing the changes that have been made to the file as a result of pulling any commits from the remote server.
git clone

you can use the git clone command to copy a repository from a remote server (like GitHub) onto your computer.
git clone git@github.com:ctesta01/ExampleRepository.git or
git clone https://github.com/ctesta01/ExampleRepository.git
workflows for collaboration
- small changes – can be reasonable to work on same branch.
- large changes – create a branch and pull request.
- outside developer – fork repository and pull request.
- remember – when working with collaborators, communication is key!
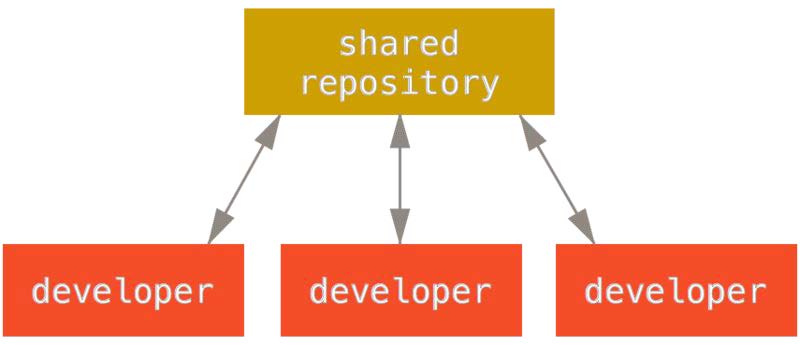
In the centralized workflow depicted, all developers synchronize their work through a main shared repository (like one on GitHub).
git branches
- Branches let you continue to work on your code without affecting the main line of development
- Creating branches for bug fixes and feature development prevents unstable code from disrupting your project or workflow.
terminal version:

git checkout -b new_branch creates a new branch named new_branch that diverges from the most recent commit on whichever branch one was on, in this case the main branch.
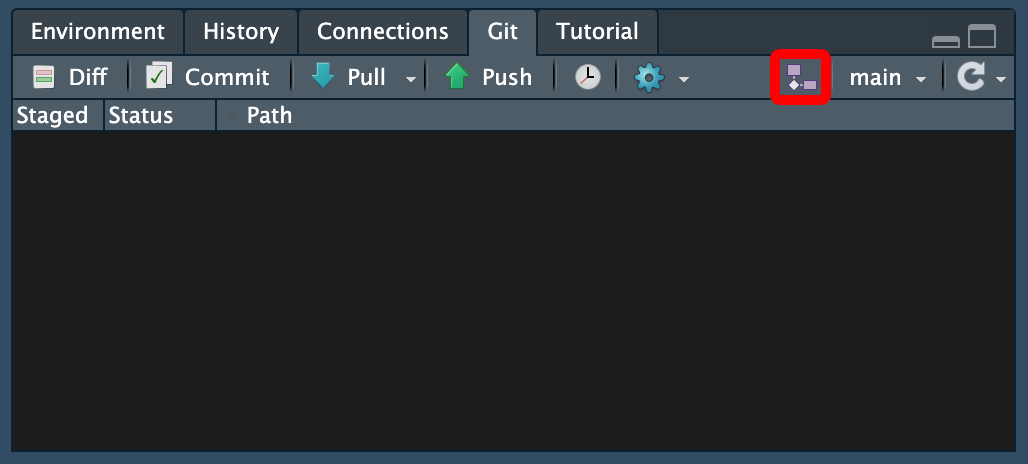
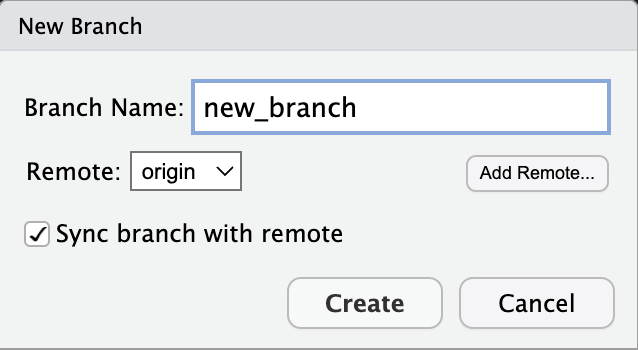
In the RStudio Git panel you can click on the New Branch button (which sometimes appears as just an icon to the left of the current branch name) and it will pop open a window allowing you to specify what you’d like to name your branch.
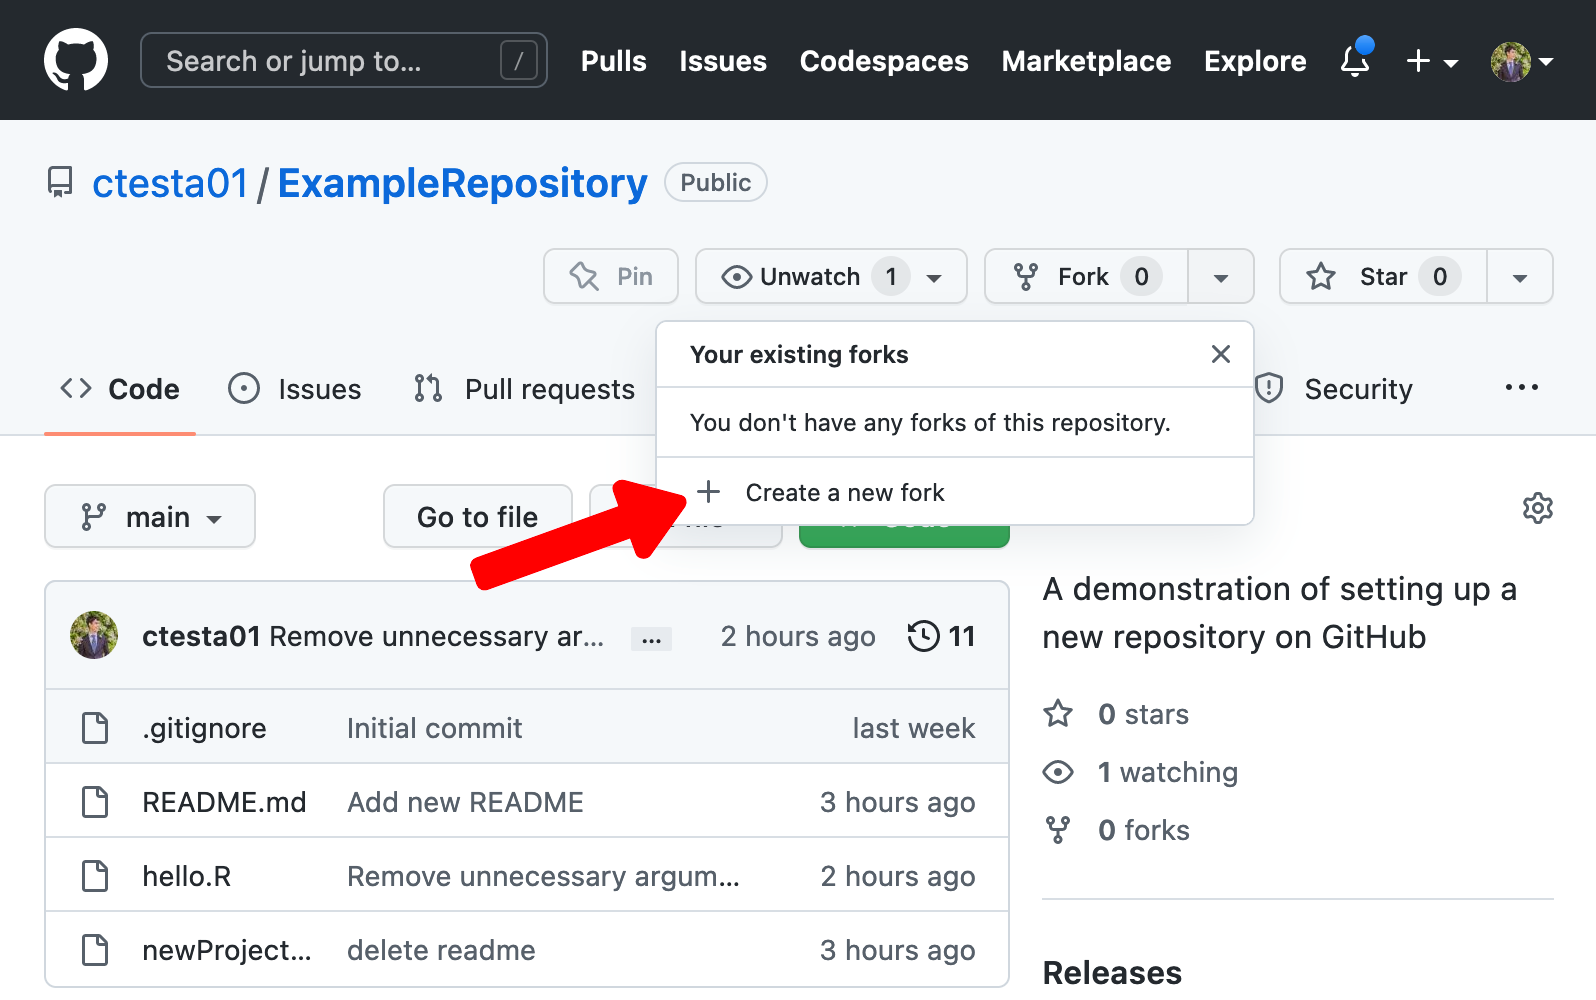
git forks
- forking crates a copy of a repository which allows development that will not affect the main project.
- forking is particularly useful when you would like to develop on another person’s project.
- forking can also be useful for versions of a project that are being developed in parallel without intention of future merge.
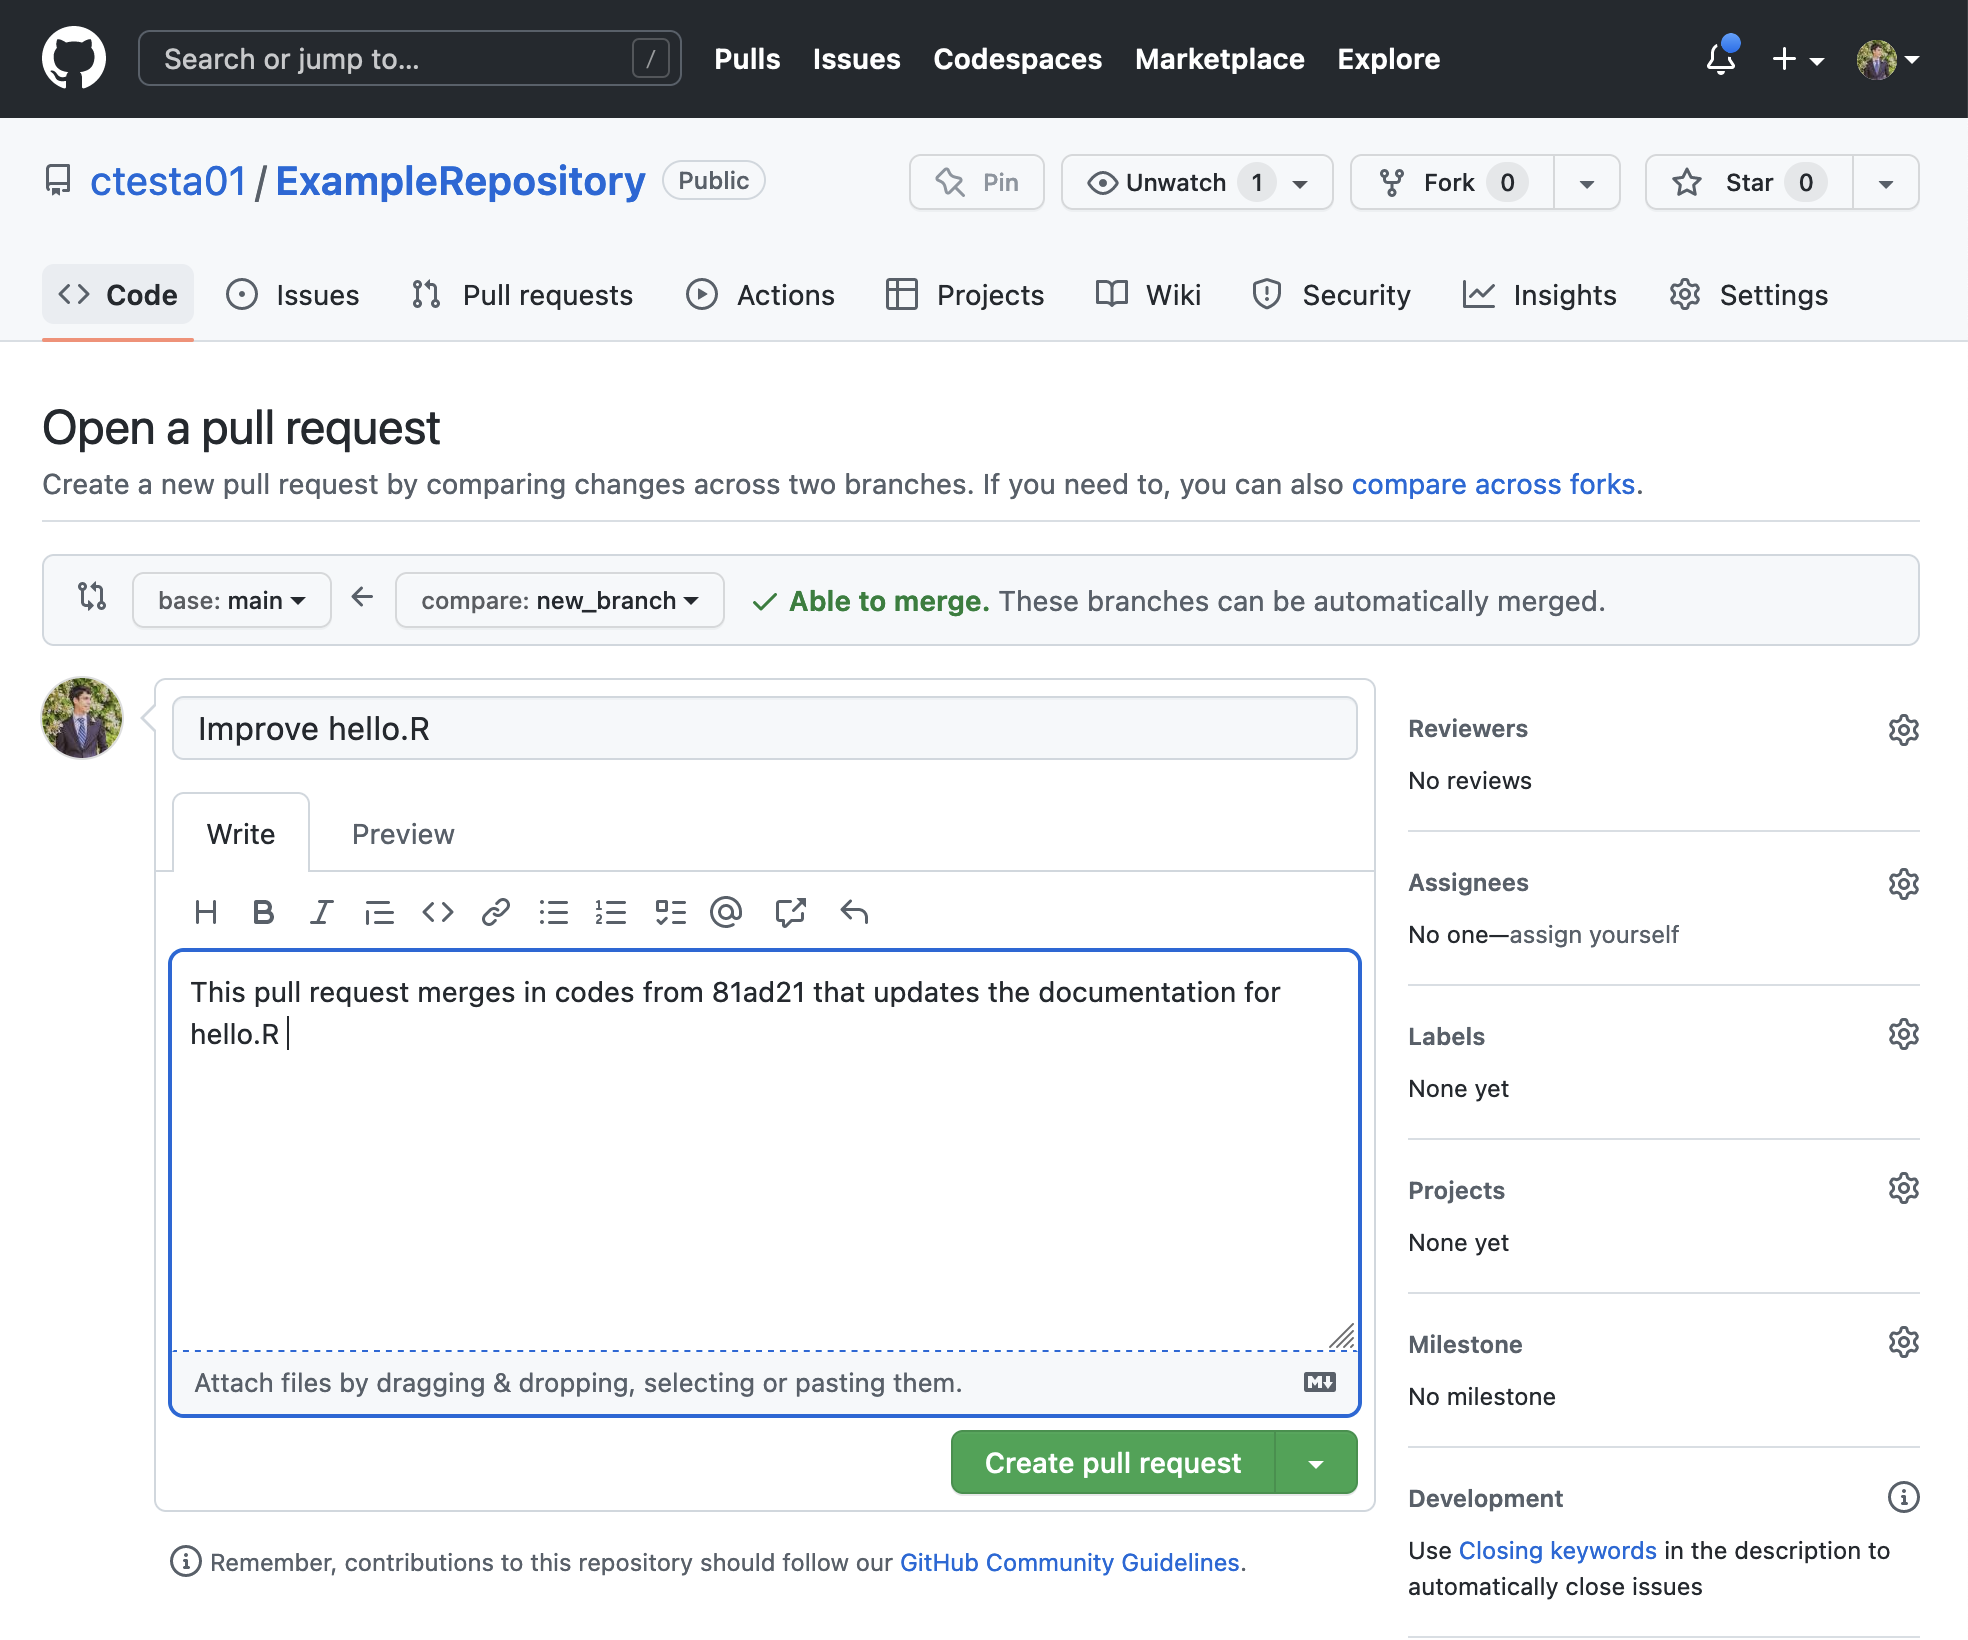
pull requests
- A pull request alerts the repository owner that changes have been made.
- Gives a chance to review and test the code before adding it into the repository.
- Optimizing language in pull requests is also important!
More helpful advice:
https://github.blog/2015-01-21-how-to-write-the-perfect-pull-request/

GitHub automatically will create a Compare & Pull Request button when it sees that you’ve pushed changes onto a new branch. If you click that, it will open up a form where you can document why you’re submitting a pull request.
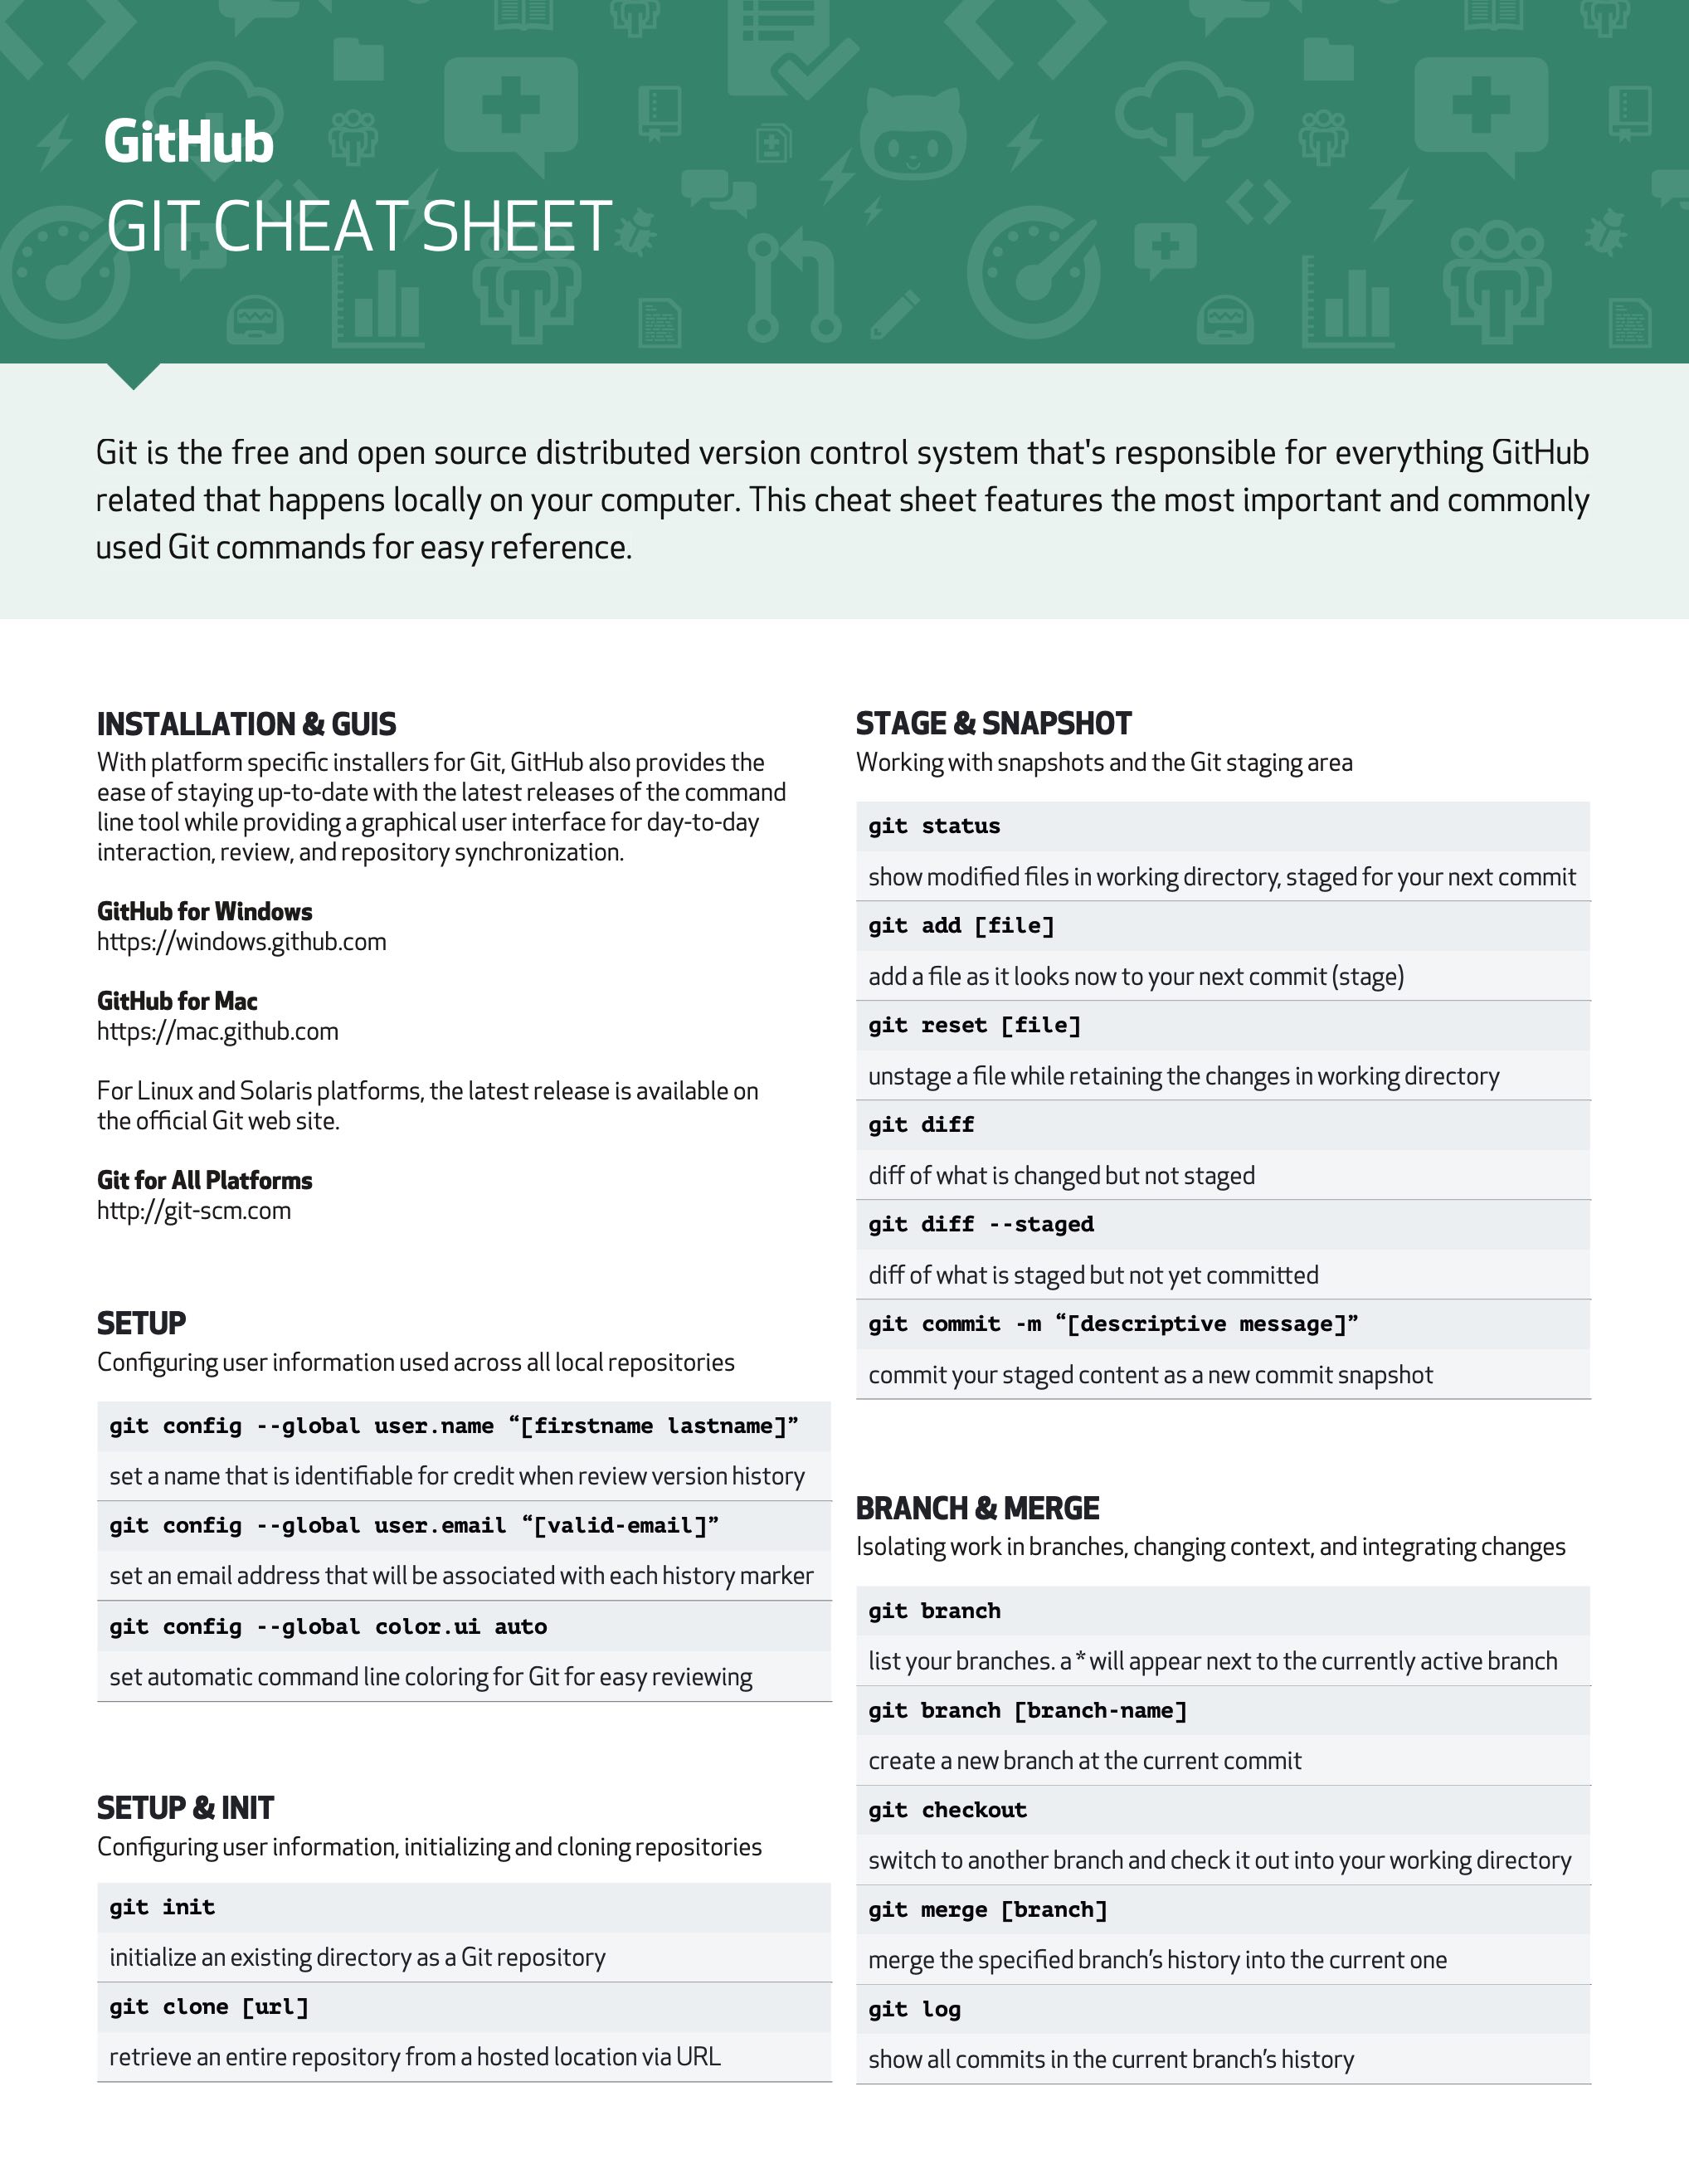
a helpful cheatsheet
GitHub provides this useful/simple cheat sheet here:
https://education.github.com/git-cheat-sheet-education.pdf
key takeaways
- git will help you version control your code, similar to track changes in MS Word, and collaborate with others.
- GitHub is an online platform that will let you freely host your git repositories, share them with others, and is one way to host a professional portfolio of code-based projects.
- A typical individual workflow will look like:
- create your R Project and a repository on GitHub
- connect them
- make changes to the project
- add changes to the staging area (with
git add) - commit them (
git commit) - push those (
git push), and continue making commits until the project is finished.
Some helpful resources:
- git — the simple guide
- Happy Git and GitHub for the useR: https://happygitwithr.com/
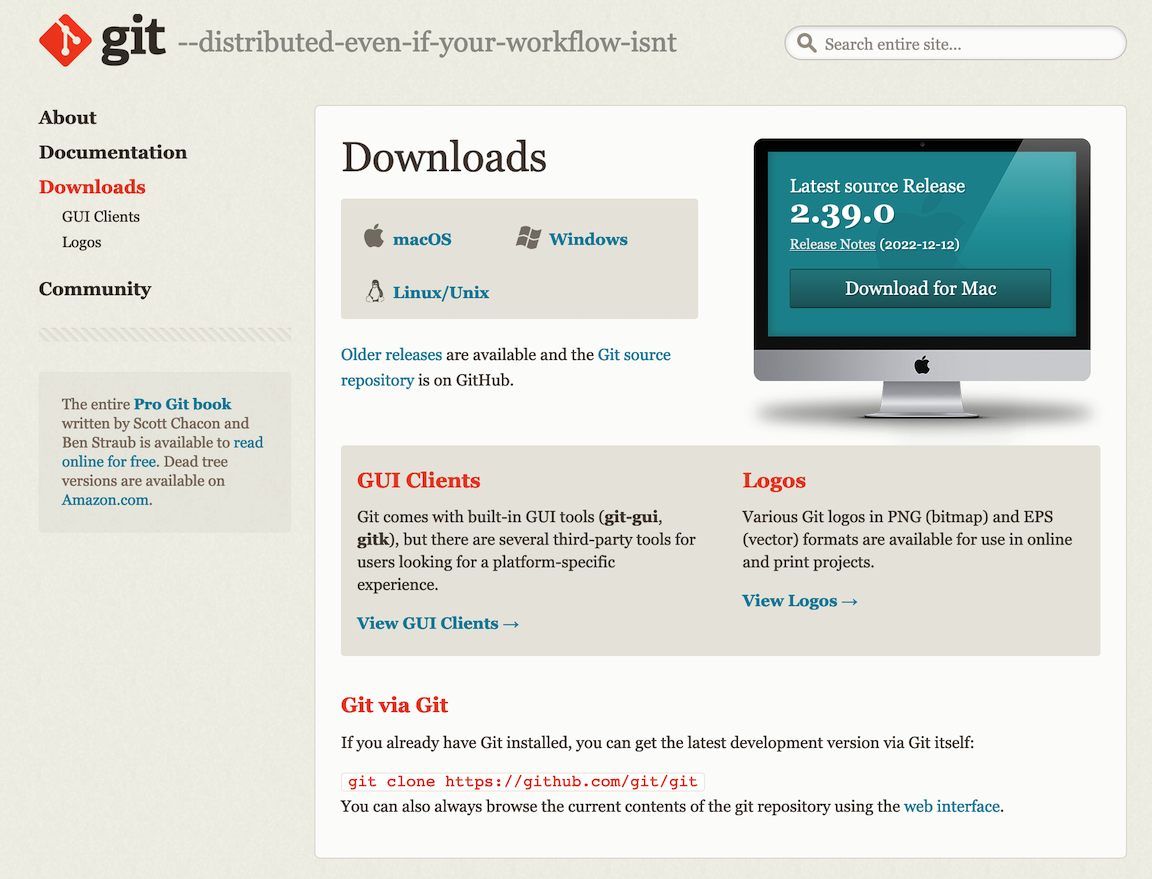
- For those who want to become experts on git, Pro Git book: https://git-scm.com/book/en/v2
- https://ohshitgit.com/ [profane] or https://dangitgit.com/en [not profane].
some hard-won advice
- Try out new git procedures in a dummy repository.
- If you “break” something (or everything), keep calm, there is almost always a fix.

image from https://www.youtube.com/watch?v=wcx6SH8Oqhs
time for a live demo 🤞